How to Clean Sterling Silver Jewellery at Home

How to Clean Sterling Silver Jewellery: The Complete Guide to Restoring Shine at Home
Your favourite silver necklace is sitting on the dresser, looking dull and slightly brown. A ring you haven’t worn in six months has gone from bright and shiny to almost black. Sound familiar?
Tarnish happens to every piece of sterling silver eventually, and it can feel disheartening when something you love starts to look neglected. The good news is that tarnish is just a surface reaction. It does not damage the silver underneath, and you can remove it completely at home using things you almost certainly already have in your kitchen.
This guide covers everything: why sterling silver tarnishes, which cleaning method to use based on how bad the tarnish is, how to clean specific piece types like chains and earrings, what to do when gemstones are involved, and how to store your jewellery so the shine lasts longer between cleans.
No fluff. No generic advice. Just practical, tested guidance that actually works.
What Is Sterling Silver and Why Does It Tarnish?
Before you start cleaning, it helps to understand what you are working with. Sterling silver is not pure silver. Pure silver (also called fine silver) is 99.9% silver, which makes it too soft to hold a ring shape, survive daily wear, or keep its form over time.
Sterling silver solves this by combining 92.5% pure silver with 7.5% copper or another metal. This is where the .925 hallmark stamped on quality silver pieces comes from. The copper content gives the metal durability and strength. It also causes tarnishing.
The Science Behind Tarnish
Copper reacts with sulphur compounds in the air. This is not some rare chemical event – sulphur is in everyday environments. It is in the air, in certain foods like eggs and onions, in rubber bands, in some papers, and even in trace amounts in many skincare products.
When the copper in your sterling silver meets sulphur, it forms a compound called silver sulfide. This is the thin grey, yellow, or black layer you see on your jewellery. It sits on the surface of the metal. The silver underneath is completely unaffected.
This matters because it changes how you clean it. You are not removing damage. You are removing a thin surface layer, which is why home cleaning methods work so well.
What Makes Tarnish Worse
Some things accelerate tarnishing faster than others. If your silver seems to tarnish unusually quickly, one of these is likely the reason:
- Swimming pools and hot tubs (chlorine reacts aggressively with silver)
- Salt water and humid sea air
- Household bleach and chemical cleaning products
- Perfume, hairspray, and most skincare productshould be s should be applied before putting jewellery on
- Rubber bands stored in contact with silver pieces
- Storing silver near non-precious metals
- Leaving pieces unworn in the open air for long periods
How to Check Your Tarnish Level Before You Choose a Method
Not all tarnish is the same, and matching the right cleaning method to your tarnish level saves you time and protects your jewellery from unnecessary exposure to stronger treatments.
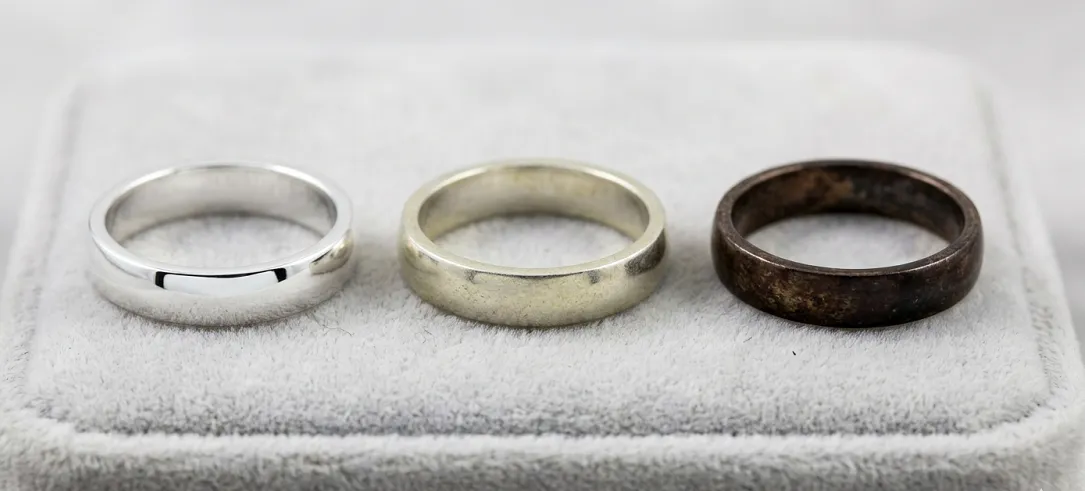
Light tarnish looks like a slight dullness or yellowish film. The silver has lost its bright shine but has not turned grey or dark. A polishing cloth is usually all you need.
Moderate tarnish shows as visible grey or brown patches across part of the piece. Soap and water or a baking soda paste will handle this well.
Heavy tarnish is when the silver has turned noticeably dark brown or black. This calls for the baking soda and aluminium foil method, which uses a chemical reaction to reverse the tarnish without scrubbing.
What You Need Before You Start
Most cleaning methods only need a few basic items. Check what you have before starting so you are not halfway through a method and missing something important.
For most methods:
- A soft, lint-free cloth (microfibre or flannel works best)
- A soft-bristle toothbrush (unused)
- A small glass or ceramic bowl
- Mild phosphate-free dish soap or washing-up liquid
- Warm water
Baking soda methods:
- Baking soda (also sold as bicarbonate of soda)
- Aluminium foil
- Boiling water
For natural alternatives:
- White vinegar
- Lemon juice
- Olive oil
For storage after cleaning:
- Anti-tarnish strips or silica gel packs
One important note: never use paper towels or tissues on silver. They feel soft,, but they contain fibres that can leave hairline scratches on the surface. Always use a proper microfibre or lint-free cloth.
Quick Answer
The best way to clean sterling silver jewellery at home is to use a silver polishing cloth for light tarnish or warm water and mild dish soap for routine cleaning. For heavier tarnish, a baking soda and aluminium foil cleaning method can help restore shine safely. After cleaning, dry jewellery thoroughly and store it in an airtight container or anti-tarnish pouch to slow future tarnishing.
How to Clean Sterling Silver Jewellery at Home: 6 Methods That Work
These six methods are ordered from gentlest to most intensive. Always start with the gentlest method that matches your tarnish level. There is no benefit to using the aluminium foil method on something that just needs a quick polish.
Method 1: Silver Polishing Cloth (Light Tarnish)
A dedicated silver polishing cloth is the simplest and safest cleaning tool for everyday maintenance. These cloths are often treated with a mild cleaning compound and work on surface dullness without any liquid or chemicals.
The technique matters here. Polish in back-and-forth strokes that follow the grain of the silver. Never rub in circles. Circular motion highlights existing micro-scratches and can create new swirl marks that are visible in bright light.
Keep going until the shine returns, then give the piece a final buff with the clean side of the cloth. This takes about two minutes and is the method you should reach for most often.
Method 2: Warm Water and Mild Dish Soap (Light to Moderate Tarnish)
This is the go-to method for most silver pieces, including those with hard gemstones like diamonds or sapphires.
Mix a few drops of mild, phosphate-free washing-up liquid into a bowl of warm (not hot) water. Place your silver jewellery in the solution and leave it for five to ten minutes. The warm soapy water loosens oils, product residue, and light tarnish.
After soaking, gently rub the piece with a soft cloth. For rings or necklaces with small details, use a soft toothbrush to reach into crevices. Rinse thoroughly under lukewarm running water to remove all soap residue, then dry immediately and completely with a lint-free cloth.
This method is gentle enough to use regularly and safe for most gemstones.
Method 3: Baking Soda Paste (Moderate Tarnish)
Baking soda is a mild abrasive. It lifts tarnish by gently abrading the silver sulfide layer without scratching the metal underneath when used correctly.
Mix baking soda with water in roughly a 2:1 ratio to form a smooth, spreadable paste. It should hold its shape without being runny. Apply a small amount to a soft cloth and rub gently over the tarnished areas.
For pieces with stamped designs, engravings, or intricate details, add a little more water to thin the paste so it gets into the pattern without getting stuck. A soft toothbrush works well for detailed areas.
Leave the paste on for one to three minutes, then rinse thoroughly under warm water. Dry completely with a lint-free cloth.
Two important cautions: do not use this method on oxidised silver (the kind with deliberately darkened details) or on rhodium-plated or silver-plated pieces. It will strip or damage the finish on both.
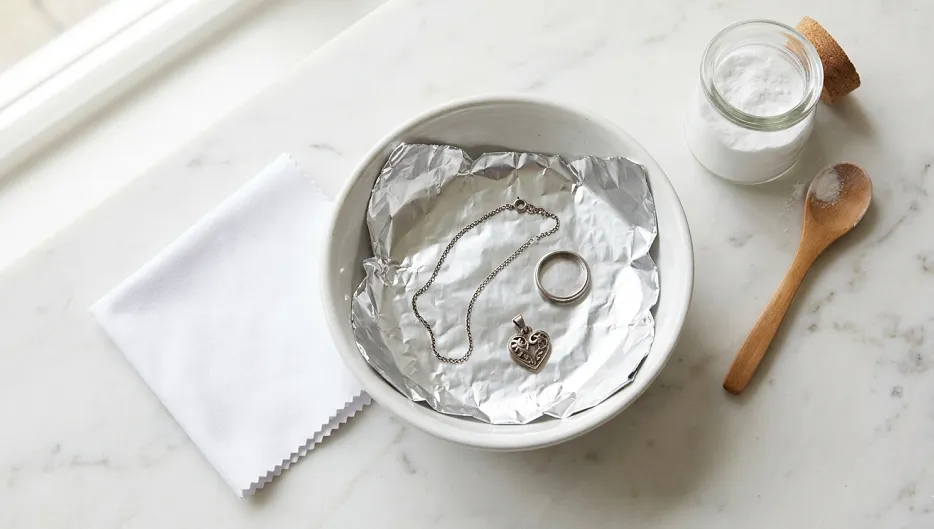
Method 4: Baking Soda and Aluminium Foil (Heavy Tarnish)
This is the most effective home method for heavily tarnished silver, and it is the one most recommended by professional jewellers for pieces that have gone very dark. What makes it different from the paste method is that it does not remove tarnish by abrasion. It reverses the chemical reaction that caused the tarnish in the first place.
How It Works
When aluminium foil, baking soda, hot water, and silver are combined, an electrolytic reaction occurs. The sulphur atoms that bonded to the silver to form silver sulfide transfer from the silver to the aluminium foil. The tarnish essentially moves from your jewellery to the foil. This is why you will notice the foil turning dark during the process.
Because the tarnish is reversed rather than polished off, this method does not thin or scratch the silver surface at all. It is ideal for intricate pieces, detailed pendants, and chain necklaces with dozens of tiny links.
Step-by-Step Instructions
- Line a bowl or baking dish with aluminium foil, shiny side facing up.
- Place your silver pieces in the bowl, making sure every piece is in direct contact with the foil. This contact is essential for the reaction to work.
- Add approximately one tablespoon of baking soda per cup of water you will be using.
- Pour boiling water over the pieces until they are fully submerged. You will see bubbling start immediately.
- Leave the pieces to soak for two to five minutes. Watch the progress. Heavily tarnished pieces may need the full five minutes; lightly tarnished pieces may be done in thirty seconds.
- Carefully remove the pieces with tongs (the water will be hot) and rinse under cool running water.
- Dry thoroughly with a lint-free cloth and buff to restore the shine.
Do not use this method on jewellery with pearls, opals, glued-in stones, or an intentionally oxidised finish.
Method 5: White Vinegar and Baking Soda Soak (Stubborn Tarnish)
For solid sterling silver pieces with stubborn tarnish that the foil method has not fully cleared, white vinegar adds another level of cleaning power through its acidity.
Mix half a cup of white vinegar with two tablespoons of baking soda in a bowl. The mixture will fizz. Once it settles, place your silver pieces in the solution and leave them to soak for two to three hours. Rinse well with clean water and dry completely.
This method works well but comes with firm limits. Do not use it on pieces with pearls, opals, turquoise, or any porous or soft gemstones. Vinegar’s acidity can permanently damage these stones and loosen adhesive-set pieces. It is best reserved for plain sterling silver pieces only.
Method 6: Lemon Juice and Olive Oil (Natural Alternative)
If you prefer a completely natural approach without baking soda, this method handles light to moderate tarnish effectively.
Mix half a cup of lemon juice with one teaspoon of olive oil. Dip a microfibre cloth into the mixture, wring it out well so it is damp rather than soaking, then gently rub the silver in small circular sections. Rinse with clean water and buff dry.
The lemon juice provides mild acidity to cut through tarni, while the olive oil buffers the process and leaves a slight protective layer on the surface. This is not the strongest cleaning method available, but it is gentle enough to use more frequently and leaves no harsh chemical residue.
A lesser-known natural option worth mentioning: lemon-lime fizzy drinks like Sprite can work for a gentle soak on very delicate pieces. Submerge the silver for an hour, then scrub gently with a soft brush and rinse well.
How to Clean Sterling Silver Jewellery by Piece Type
Different pieces present different cleaning challenges. A chain has dozens of tiny link joints where tarnish hides. A ring has an inner band that most people forget to dry. Here is how to approach each piece type properly.
Cleaning a Sterling Silver Necklace or Chain
Chains tarnish faster than most other jewellery because tarnish collects in the small gaps between every link. The baking soda and aluminium foil method works particularly well for chains because the reaction reaches into all those gaps without scrubbing.
If you are using the soap and water method, lay the chain flat in the bowl rather than balling it up. After cleaning, rinse it flat as well to avoid kinking. Pay attention to the clasp: moisture that sits in a clasp mechanism causes corrosion and can eventually weaken it. Dry the clasp by opening and closing it several times while holding it against a dry cloth.
After cleaning a chain, let it fully air-dry flat before storage to make sure no moisture remains between the links.
Cleaning Sterling Silver Rings
The soap and water method is the safest first step for most rings, including those set with diamonds or other hard stones.
For stacking rings, take them apart and clean each one individually. Rings that sit against each other pick up oils and residue right at the contact points, which is often the area that tarnishes first.
The inner band is the part most people miss. Skin oils, soap residue, and hand cream build up on the inside of a ring constantly. After cleaning, pay deliberate attention to the inside surface. Dry it thoroughly because moisture trappedagainst thet skin is one of the fastest ways to cause tarnish and can also cause skin irritation.
For engraved or detailed band rings, a thin baking soda paste applied with a soft toothbrush reaches the engraved areas effectively.
Cleaning Sterling Silver Earrings
Earrings carry a particular hygiene consideration beyond just tarnish. The post and butterfly back on a stud earring come into direct contact with skin and pick up oils, dried skincare products, and general grime quickly.
Clean the post, the butterfly back, and the back face of the stud, not just the front. For hoops, clean the inside curve of the hoop as well as the outside. Oils from skin contact accumulate inside the curve and are easy to miss.
If you wear ear stacks with multiple pieces, clean each earring separately before reassembling the look. This is also a good moment to check that any butterfly backs are still holding tension securely.
Avoid soaking earrings that have any glued elements, including resin-filled studs or acrylic backs.
Cleaning Sterling Silver Bracelets and Bangles
Solid bangles are the easiest to clean. Start with a polishing cloth for light tarnish. For heavier tarnish, a baking soda paste or the foil method works well.
For chain bracelets, the same approach as chain necklaces applies. The foil method is particularly effective because it reaches the spaces between links without any scrubbing force that could stress the jump rings or clasp connections.
Pay attention to any hinges or box clasps. Use a toothbrush to clean inside the hinge joint, then dry the joint carefully. A hinge that traps moisture will tarnish from the inside out.
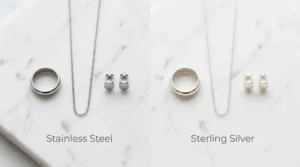
Sterling Silver vs Silver-plated Jewellery
| Feature | Sterling Silver | Silver-Plated Jewellery |
|---|---|---|
| Silver Content | 92.5% Pure Silver | Thin Silver Coating |
| Tarnish Resistance | Good | Lower |
| Durability | High | Moderate |
| Lifespan | Decades With Care | Months to Years |
| Repairable | Yes | Limited |
| Value | Higher | Lower |
Sterling silver jewellery contains 92.5% pure silver throughout the metal, making it significantly more durable and valuable than silver-plated jewellery. Silver-plated jewellery only has a thin layer of silver over another base metal, which means the coating can wear away with regular use. Understanding this difference is important because cleaning methods, maintenance requirements, and expected lifespan can vary considerably between the two types of jewellery.
Cleaning Sterling Silver Jewellery with Gemstones
This is where most people make costly mistakes. Gemstones vary enormously in their hardness, porosity, and sensitivity to heat, acids, and chemicals. A method that safely cleans your plain silver bangle could permanently damage a ring set with an opal or emerald.
Safe Methods for Silver with Diamonds and Hard Stones
Diamonds, rubies, and sapphires are among the hardest gemstones and tolerate gentle cleaning well. The soap and water method is safe for silver jewellery set with these stones. Use a soft toothbrush to clean around the back of the setting where oils and soap residue build up behind the stone.
Avoid soaking for extended periods, even with hard stones. Prolonged exposure to water can loosen prong settings over time, particularly in older pieces.
How to Clean Silver with Pearls, Opals, Turquoise, and Soft Stones
These stones need a very different approach:
Pearls are organic and extremely sensitive. Never soak pearl jewellery, never use any chemical method, and never use vinegar or baking soda near them. Wipe pearl pieces with a barely damp soft cloth, then dry immediately. Pearl surfaces can be permanently dulled by acids and detergents.
Opals have high water content and are porous. They are sensitive to both acids and sudden temperature changes. A slightly damp soft cloth is the only safe cleaning tool. The foil method’s boiling water would be damaging, and vinegar could alter the stone’s appearance permanently.
Turquoise is porous and absorbs chemicals readily. Exposure to soaps, vinegar, or any cleaning solution can cause permanent colour changes. Wipe only with a dry or barely damp cloth.
Emeralds are often treated with oil or resin to enhance their clarity. Any cleaning solution that penetrates the stone can disturb this treatment. Professional cleaning is the safest option for emerald-set silver pieces.
Amethysts, topaz, and citrines are reasonably durable and tolerate the soap and water method well, but avoid prolonged soaking and never use the vinegar soak.
Gemstone Cleaning Compatibility at a Glance
| Stone | Polishing Cloth | Soap + Water | Baking Soda Paste | Foil Method | Vinegar Soak |
|---|---|---|---|---|---|
| Diamond | Safe | Safe | Use with care | Use with care | Avoid |
| Ruby / Sapphire | Safe | Safe | Use with care | Use with care | Avoid |
| Amethyst / Topaz | Safe | Safe | Avoid | Avoid | Avoid |
| Pearl | Safe | Avoid | Avoid | Avoid | Avoid |
| Opal | Safe | Avoid | Avoid | Avoid | Avoid |
| Turquoise | Safe | Avoid | Avoid | Avoid | Avoid |
| Emerald | Safe | Use with care | Avoid | Avoid | Avoid |
Caring for Rhodium-Plated and Silver-Plated Sterling Silver
This section fills a gap that most jewellery care guides completely ignore, and it is important because many popular sterling silver pieces, including those from major jewellery brands, are rhodium-plated.
What Rhodium Plating Is and Why It Changes Your Cleaning Approach
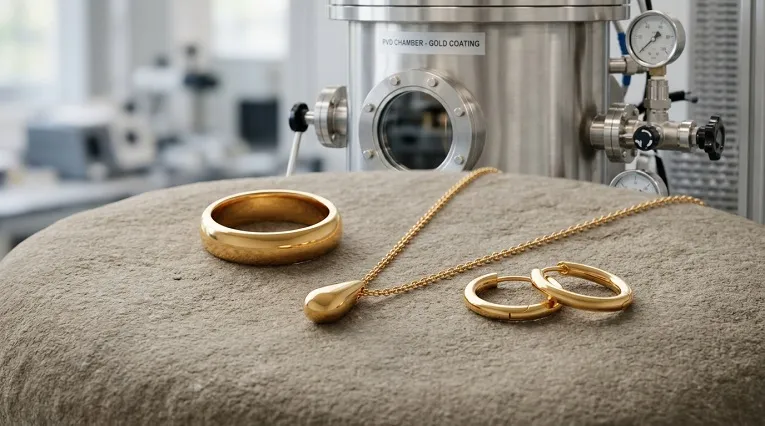
Rhodium is a rare precious metal from the platinum group. It has an exceptionally bright, white finish and is highly resistant to tarnishing. When sterling silver is rhodium-plated, a very thin layer of rhodium is deposited over the silver surface. This layer gives the piece extra shine and significantly slows down tarnishing.
The catch is that this layer is thin. Abrasive cleaning methods will gradually strip it away. Once the rhodium is removed in patches, the silver underneath is exposed and will tarnish unevenly, which looks far worse than uniform tarnish on unplated silver.
For rhodium-plated jewellery, use only the soap and water method or a gentle wipe with a damp cloth. No baking soda paste, no foil method, no vinegar. The polish cloth is fine for removing surface marks without using chemicals.
If your rhodium-plated piece has worn through to the silver underneath and is tarnishing, a professional jeweller can re-plate it.
Sterling Silver vs Silver-Plated Jewellery
These two things are often confused. Sterling silver is solid throughout, 92.5% silver all the way through. Silver-plated jewellery has a base metal core (often brass or copper) with a thin layer of silver applied to the outside.
Check for a .925 hallmark. Sterling silver will have it. Silver-plated pieces typically will not, or they may be marked “Silver Plated,” “EP,” or “EPNS.”
For silver-plated pieces, gentle cleaning only. Abrasive methods remove the thin silver layer and expose the base metal underneath, which cannot be cleaned back to looking like silver.
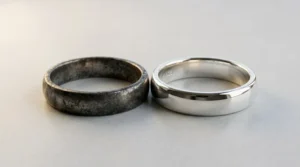
How to Clean Oxidised and Antique Sterling Silver
Oxidised silver is a style choice, not a fault. Jewellery makers intentionally darken the recessed areas of a piece to make the decorative details stand out more clearly. This is done by applying a chemical treatment that accelerates silver sulfide formation in targeted areas. The result is a beautifully contrasted piece where the raised surfaces are bright silver and the recessed areas are dark.
The problem comes when people clean oxidised silver using the aluminium foil method. That method reverses silver sulfide formation. It will remove the intentional darkening along with any natural tarnish, leaving you with a flat-looking piece that has lost its decorative depth.
For oxidised silver, clean only the raised, bright surfaces using a damp cloth or a very mild soap-and-water wipe. Work carefully and avoid scrubbing into the dark recessed areas. If you do accidentally remove some of the oxidised finish, a professional jeweller can re-apply it.
For antique silver pieces with genuine age patina, consider whether cleaning is actually what you want. Patina on antique silver can be part of its character and value. When in doubt, consult a professional jeweller before cleaning anything old or valuable.
What Not to Use on Sterling Silver Jewellery
These are things that seem like they might work, and some of them genuinely do remove tarnish, but they do damage in the process that you may not notice immediately.
The Cleaning Products That Cause Problems
Toothpaste is one of the most commonly recommended home remedies, and it is one of the most consistently damaging. Toothpaste contains abrasive particles designed to scrub dental plaque. These particles create tiny scratches across the silver surface. The silver may look brighter immediately after because the scratches catch light differently, but under magnification, the surface is damaged.
Windex and ammonia-based cleaners are too harsh for sterling silver. Ammonia can strip finishes, damage gemstone coatings, and accelerate tarnishing in the long run.
Bleach is particularly problematic. Many people reach for it thinking it is a powerful cleaner, but bleach chemically accelerates the oxidation of copper in sterling silver. It accelerates tarnishing and can cause corrosion.
Abrasive scrubbing pads scratch silver quickly and visibly. Even the softer green kitchen pads are too rough for silver.
The dishwasher should never be used for silver jewellery. The combination of high heat, harsh detergent, and prolonged exposure to water will cause permanent tarnish and can loosen gemstone settings.
Quick Do’s and Don’ts Reference
| Do | Do not do |
|---|---|
| Polish in back-and-forth grain strokes | Polish in circular motions |
| Use a microfibre or lint-free cloth | Use paper towels or tissues |
| Dry pieces completely after every clean | Leave silver wet or air-dry slowly |
| Store in anti-tarnish pouches or airtight containers | Store touching rubber bands |
| Clean gently with an appropriate method for the tarnish level | Use toothpaste |
| Use mild phosphate-free washing-up liquid | Use bleach, Windex, or ammonia cleaners |
| Consult a jeweller for antique or oxidised pieces | Put silver in the dishwasher |
How to Store Sterling Silver Jewellery to Prevent Tarnishing
Cleaning removes tarnish. Proper storage prevents it from forming quickly again. Many people clean their silver beautifully and then drop it in an open jewellery dish where it is exposed to air and humidity, and it tarnishes within weeks.
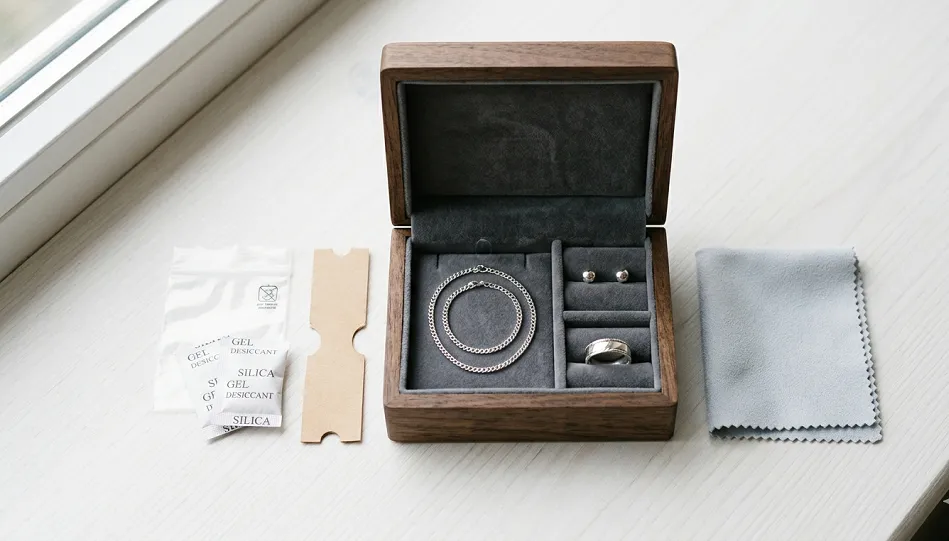
Anti-Tarnish Storage Options That Work
Anti-tarnish strips are small paper tabs that absorb sulphur compounds from the air inside a closed storage container. They are affordable, widely available, and genuinely effective. Place one strip per compartment or zip-lock bag and replace them every few months.
Silica gel packs (desiccant crystals) reduce moisture inside storage areas. Moisture accelerates tarnishing, so keeping storage areas dry makes a real difference, especially in humid climates.
A piece of chalk or activated charcoal placed inside a jewellery box drawer absorbs moisture and traces of sulphur from the air. This is an old watchmaker’s trick that still works well.
Felt-lined jewellery boxes provide the right kind of storage surface. Keep individual pieces separated from each other to prevent scratching, tangling (for chains), and the transfer of tarnish between pieces.
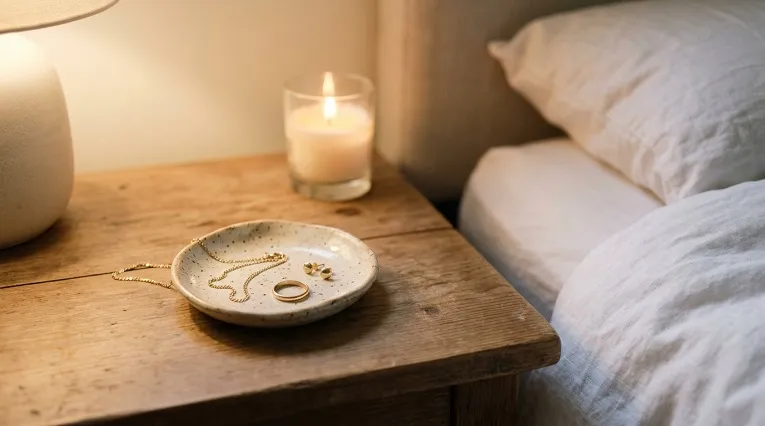
Store silver somewhere cool, dark, and dry. A bedside table drawer is generally better than a bathroom shelf, where steam from showers creates repeated humidity exposure.
Travelling with Sterling Silver Jewellery
Travel is one of the fastest ways to tarnish silver jewellery because pieces end up jumbled together in bags, exposed to varying humidity, and sometimes left in hotel bathrooms.
Use individual zip-lock bags for each piece, or invest in a small travel jewellery roll with separate fabric-lined compartments. Anti-tarnish pouches designed for travel are available from most jewellery suppliers and work extremely well for trips longer than a few days.
Remove your silver before beach visits. Salt air and sun exposure are among the quickest tarnish accelerators. Store pieces in your hotel room rather than leaving them in a beach bag or car.
How Often Should You Clean Sterling Silver Jewellery?
There is no single answer because it depends on how often you wear a piece, what it comes into contact with, and where you live.
As a starting framework:
| Situation | Recommended cleaning frequency |
|---|---|
| Worn daily (rings, necklaces) | Polish cloth every 2 to 4 weeks; deep clean every 3 to 6 months |
| Worn occasionally | Polish before each wear; deep clean 2 to 3 times per year |
| Stored unworn | Deep clean before storage; clean again before wearinHigh-humidity |
| ty environment | Polish monthly; deep clean every 2 to 3 months |
| After contact with pool, sea, or chemicals | Clean as soon as possible after exposure |
The most useful general rule: if you wear a piece regularly, it needs cleaning less often. The natural oils from your skin and the gentle friction of daily wear act as a maintenance buffer. Pieces that sit unused tarnish faster because they are exposed to air without any buffering.
Can You Shower With Sterling Silver Jewellery?
While sterling silver jewellery can handle occasional contact with water, wearing it in the shower is generally not recommended. Water alone is not usually the main problem. Instead, the issue comes from the products used during showering, including soap, shampoo, conditioner, and body wash.
Over time, these products can leave residue on the surface of sterling silver jewellery, reducing its shine and making it appear dull. In areas with hard water, mineral deposits may also build up and affect the appearance of the metal.
Swimming presents even greater risks. Chlorine from swimming pools and chemicals found in hot tubs can accelerate tarnishing and may damage certain gemstones set into sterling silver jewellery. Saltwater can also contribute to corrosion and surface discolouration over time.
If you accidentally wear sterling silver jewellery in the shower, simply rinse it with clean water, dry it thoroughly using a soft cloth, and store it properly once it is completely dry. Removing jewellery before showering remains the best way to maintain its shine and extend its lifespan.
Long-Term Tarnish Prevention: How to Keep Your Silver Looking Good Between Cleans
Prevention is genuinely easier than cleaning, and a few consistent habits will significantly extend the time between sessions.
The Last-On, First-Off Rule
This is the most practical habit you can build. When getting ready, put your jewellery on last, after all your skincare, perfume, and hairspray have been applied and have had time to dry. These products land on silver and accelerate tarnishing immediately.
When you come home, take your jewellery off first. Wipe each piece with a dry microfibre cloth before putting it away. This removes skin oils and any product residue before it starts reacting with the metal.
Remove silver before swimming, showering, exercising, cleaning the house, and cooking. This is particularly important for cooking because certain foods, eggs, onions, and mustard release sulphur compounds that react with silver visibly and quickly.
An Eco-Friendly Approach to Silver Care
If you prefer to avoid commercial cleaning products, the good news is that the most effective home methods are also the most natural ones. Baking soda, lemon juice, and white vinegar are all biodegradable and produce no toxic residue.
The aluminium foil method uses no chemicals at all beyond baking soda. The foil can be rinsed, dried, and recycled after use.
Wearing your silver jewellery regularly is itself the most sustainable form of maintenance. Consistent wear keeps pieces bright and reduces the need for cleaning. A piece worn daily typically needs nothing more than a quick wipe and an occasional soap and water clean.
For a natural post-clean protectant, a tiny amount of olive oil buffed onto clean silver with a cloth leaves a very light barrier that slows the return of tarnish without any chemical involvement.
When to Take Sterling Silver to a Professional Jeweller
Home cleaning handles the vast majority of tarnish situations well. But there are specific circumstances where professional care is the right call:
Severe corrosion or pitting. If the surface of the silver has developed actual pitting or the tarnish has been left so long that home methods are not clearing it, a professional jeweller has access to ultrasonic cleaners and polishing equipment that can restore the surface.
Loose or damaged gemstone settings. Never clean a piece with a loose stone at home. The vibration from scrubbing or the soak from immersion can cause the stone to fall out. Have the setting repaired first.
Antique and heirloom pieces. If a piece has monetary or sentimental significance, the risk of home cleaning mistakes outweighs the convenience. Professional cleaning is worth the cost.
Oxidised silver that needs re-oxidising. If you have accidentally stripped the intentional darkening from an oxidised piece, a jeweller can reapply it.
Rhodium-plated pieces that need re-plating. When the rhodium wears through and the silver underneath is showing, re-plating restores the original finish and tarnish resistance.
Structural problems. Bent clasps, broken links, and damaged settings need repair, not just cleaning.
Best Products for Cleaning Sterling Silver Jewellery
Although many effective sterling silver cleaning methods use household ingredients, some specialised products can make maintenance easier and more effective.
Silver polishing cloths are among the safest options for removing light tarnish and restoring shine without scratching the surface. Microfibre cloths are also useful for routine cleaning and drying after washing.
For long-term storage, anti-tarnish strips and anti-tarnish pouches help reduce exposure to moisture and airborne sulphur compounds, both of which contribute to tarnishing. Jewellery cleaning solutions designed specifically for sterling silver can also be helpful for heavily tarnished pieces, but they should always be used according to the manufacturer’s instructions.
Investing in a few quality jewellery-care products can significantly reduce cleaning time while helping your sterling silver jewellery stay brighter for longer.
Frequently Asked Questions
Can I use toothpaste to clean sterling silver jewellery?
No. Toothpaste contains abrasive particles that scratch the silver surface. While it does remove tarnish, it also leaves microscopic scratches that make the surface look duller over time and are not reversible at home. Use the baking soda paste method instead; it is gentler and more effective.
Does sterling silver tarnish in water?
Clean, fresh water on its own is not a significant problem, though you should always dry silver immediately and completely after any water contact. Chlorinated water from swimming pools is a different matter; chlorine reacts directly with sterling silver and causes accelerated tarnishing and can lead to surface damage with repeated exposure.
Why is my sterling silver turning black?
Your silver is turning black because silver sulfide has formed on the surface. This happens when the copper in sterling silver reacts with sulphur compounds in the environment. The most common culprits are humidity, rubber, certain skincare products, and foods like eggs. The good news is that silver sulfide is only on the surface and can be removed completely using the baking soda and aluminium foil method.
Is it safe to use vinegar on sterling silver jewellery?
It is safe on solid sterling silver pieces without gemstones. White vinegar works well for stubborn tarnish when combined with baking soda. However, do not use vinegar on pieces with pearls, opals, turquoise, emeralds, or any porous or soft stone. Vinegar’s acidity can permanently alter these stones and loosen adhesive-set pieces.
Does wearing sterling silver prevent tarnishing?
Yes, to a meaningful degree. The natural oils your skin produces create a thin barrier on the surface of silver that slows down the sulphur reaction. Friction from regular wear also helps keep the surface buffed. Silver pieces worn daily often need far less cleaning than pieces that sit stored and unworn. This is why jewellers sometimes advise clients to wear their silver often rather than saving it for special occasions.
Can I use an ultrasonic cleaner on sterling silver jewellery at home?
Ultrasonic cleaners work by sending vibrations through liquid to remove dirt and tarnish. They are effective on solid sterling silver pieces with no gemstones or with securely set hard stones like diamonds. They are not safe for pearls, opals, emeralds, or turquoise, and they can shake loose stones out of prong settings if the setting is already slightly worn. Home ultrasonic cleaners are less powerful than professional machines but still carry these risks. If in doubt, use the aluminium foil method instead, it is just as effective for tarnish removal and involves no vibration risk.
A Note on Building Good Habits
Caring for sterling silver does not need to be complicated or time-consuming. Most of what keeps jewellery looking good comes down to a few consistent habits: wiping pieces after wearing them, storing them properly, and cleaning them promptly when tarnish appears rather than letting it build up over months.
The methods in this guide will remove tarnish at any level. The habits in this guide will mean you need those methods less often.
Your silver is meant to be worn, enjoyed, and passed on. With the right care, it will last many lifetimes.